
pythonの実行環境(パッケージ管理や仮想環境)といえば、Anacondaという気持ちでしたが、Anacondaは一定以上の規模の法人では有料で会社で使いづらい。
プログラマーではないとはいえ、業務効率化のためpythonを使い始めると、書き捨てコードだけでなくパッケージ化も必要になる時があります。
色々と調べてみると、パッケージ管理や仮想環境構築だけでなく、自作プログラムのパッケージ化まで簡便にできるpoetryとやらがあるようでしたので、導入してみました。
pythonのinstall
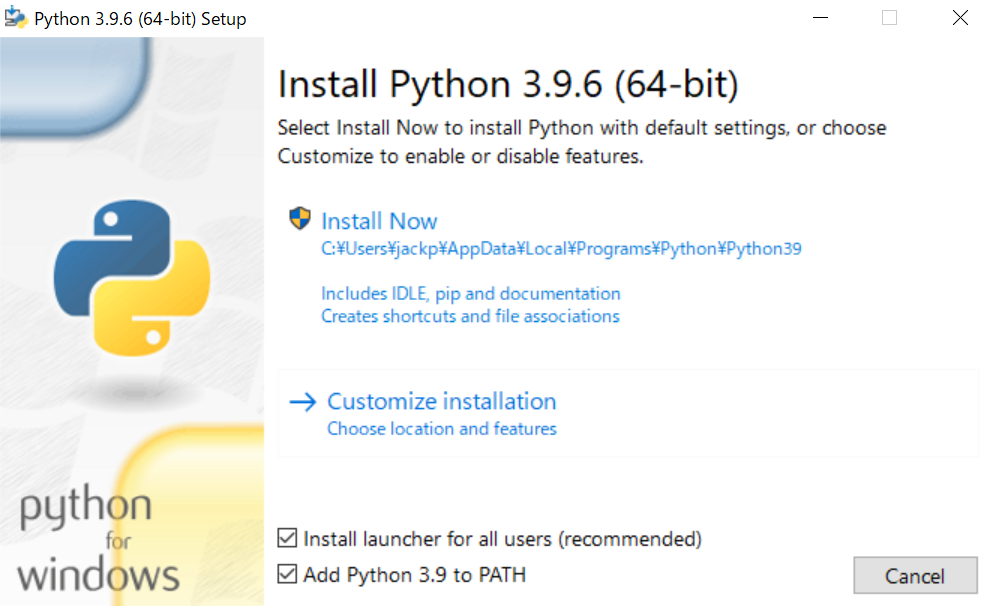
「Download Windows installer (64-bit)」をダウンロード
Python Releases for Windows
The official home of the Python Programming Language
www.python.org
Add Python 3.9 to PATHにチェックしてinstall
poetryをinstall
(Invoke-WebRequest -Uri https://raw.githubusercontent.com/python-poetry/poetry/master/get-poetry.py -UseBasicParsing).Content | python -
Introduction | Documentation | Poetry - Python dependency management and packaging made easy
Introduction Poetry is a tool for dependency management and packaging in Python. It allows you to declare the libraries your project depends on and it will mana...
python-poetry.org
プロジェクトの作成
VScodeを立ち上げ、ターミナル(power shell)に以下のコマンド打ち込み、プロジェクトのセットアップを行います。
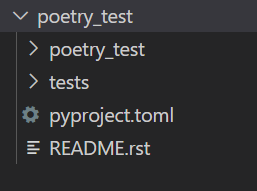
poetry new poetry_project # poetry_projectはプロジェクトのフォルダ名プロジェクトフォルダが初期化され、以下のようなフォルダやファイルが作成されます。
仮想環境の作成
VScodeのターミナル上で先ほど作成したフォルダに移動し、さらに以下をターミナルに入力します。
これによりVScode上で仮想環境が構築され、フォルダ内に「.venv」というフォルダが作成されます。
poetry config virtualenvs.in-project true
poetry shell
VScodeで仮想環境の読み込み
「ctrl + shift + P」で表示される検索窓から「select interpreter」と入力し、上で作成した「.venv」内に格納されているpython.exeを選択します。

その結果、VScodeの左下に仮想環境が読み込まれていることが表示されます。

パッケージの追加・削除
作成した仮想環境中にパッケージを追加・削除するには、以下のように行います。
poetry add pandas # ライブラリの追加
poetry remove pandas # ライブラリの削除
例えば、vscodeでjupyterを使用したい場合にはipykernelが必要ですので、以下のように行います。
poetry add ipykernel

コメント